
Custom fields add structured questions to ticket forms, for example an order number or the environment of an error. Form templates decide which fields appear for a product, category or department. The answers are stored on the ticket and can be used in search and exports.
Where to find it: Setup → Support → Forms and fields; in the menu, Setup → Forms (administrators only).
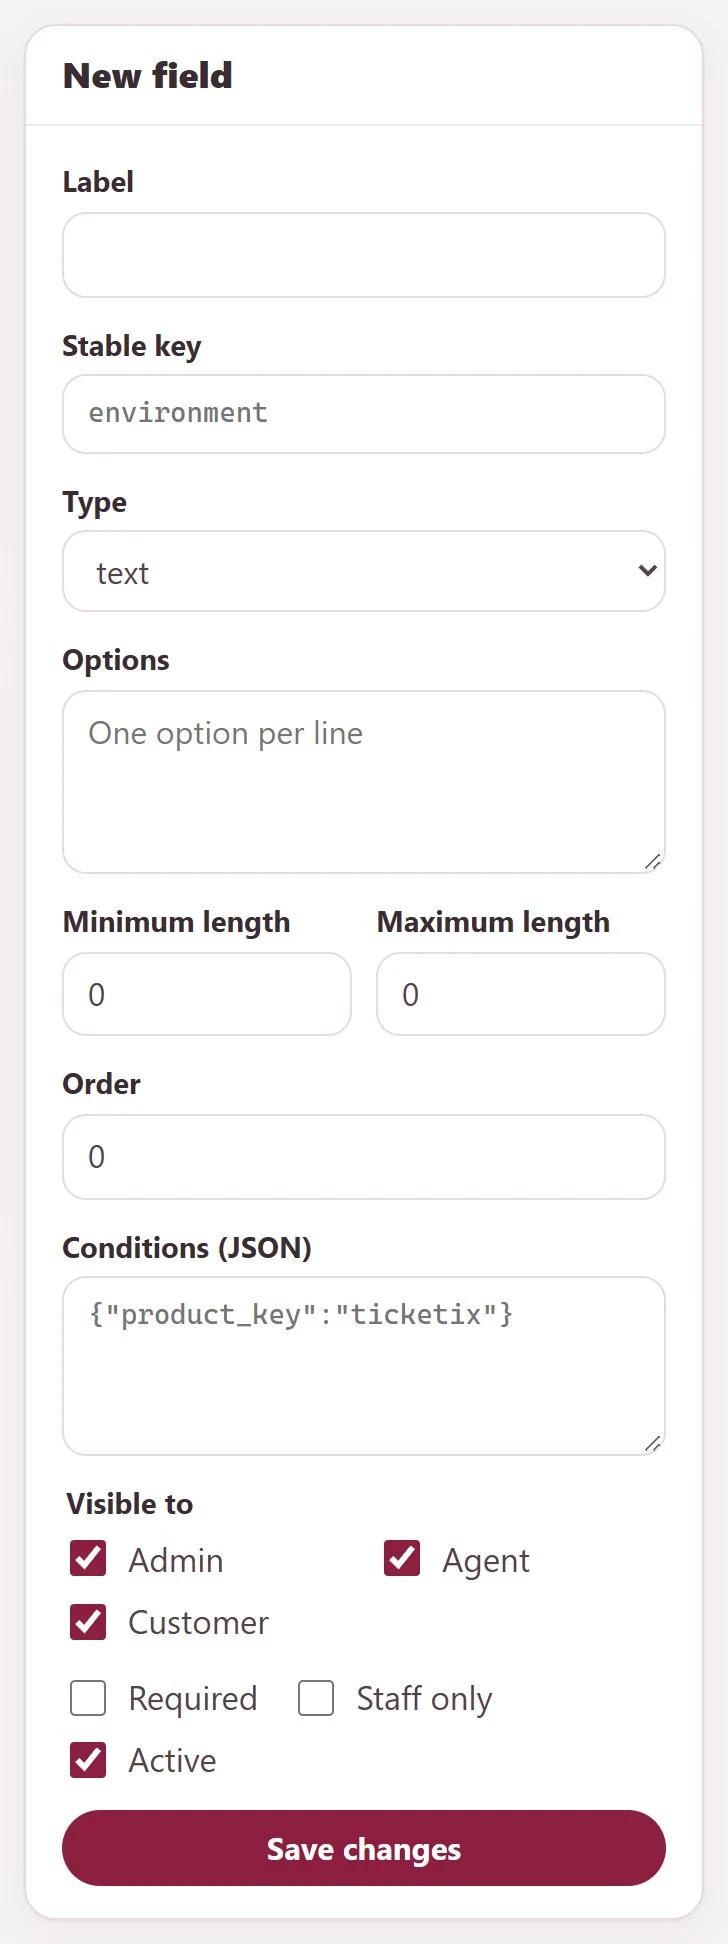
Create a field
- Under Custom fields, click New field. Enter the Label and a Stable key, for example
environment. The key stays the same when you rename the label. - Choose the Type:
text,textarea,number,dropdown,radio,checkbox,dateorfile. - For
dropdown,radioandcheckbox, enter the Options, one option per line. - Optional: set Minimum length, Maximum length and Order.
- Optional: enter Conditions (JSON) to show the field only when another answer matches, for example
{"product_key":"helpdesk"}. - Under Visible to, choose Admin, Agent and Customer. Select Required if the field must be filled, and Staff only for a field that only staff fill in.
- Keep Active selected and click Save changes.
The list shows each field with its type, rules, visibility and status. Field preview shows how the field looks.
Create a form template
- Under Form templates, click New form template and enter a Name.
- Choose when the template applies: Product, Category and Department key. All means any value.
- Under Fields in order, choose the fields and their order.
- Keep Active selected and click Create version 1.
Every save of a template creates a new, unchangeable version (Create next version). Existing tickets keep the version they were created with.
Where the answers appear
- Customer portal and guest form: customer-visible fields of the matching template appear in the ticket window as soon as the customer chooses the product. Customers see their answers on their ticket page.
- Ticket screen: agents see and edit the answers under Captured data, with the version of the form, and save them with Save captured data. Staff-only fields are filled in here.
- Ticket list: Search in → Custom fields searches the answers.
Tips
- Create the fields first; a template needs fields.
- Keep required fields to what you really need. Each required field is one more step for the customer.
- Use the product key from Setup → Support → Products in conditions and template rules.
Related articles
Still stuck?
Ask the community