
Fonts decide whether a participant's name looks right on the card. The Fonts screen shows which letters each installed font can write, installs Google Fonts families and takes your own font files.
Where to find it: Fonts in the admin menu.
Participant pages load fonts only from your Cardix installation and never connect to Google.
The language filter
Language at the top of the screen chooses one of 54 languages, or All languages. It shows the Google Fonts families of that language and marks the installed fonts that cannot write it.
The screen has three tabs: Installed fonts, Google Fonts and Upload a font.
Installed fonts
| Column | What it shows |
|---|---|
| Font | The name of the font and its letter check |
| Source | Cardix (the font pack of Cardix), Google Fonts or Uploaded |
| Languages | The languages the font supports |
| Styles | Regular, Bold, Italic and Bold italic, when the font has them |
| In use | How many places use the font |
| Actions | Delete |
The letter check shows for every installed font whether it writes all Arabic and all Turkish letters, for example "Arabic: every letter" or "Turkish: missing" followed by the missing letters.
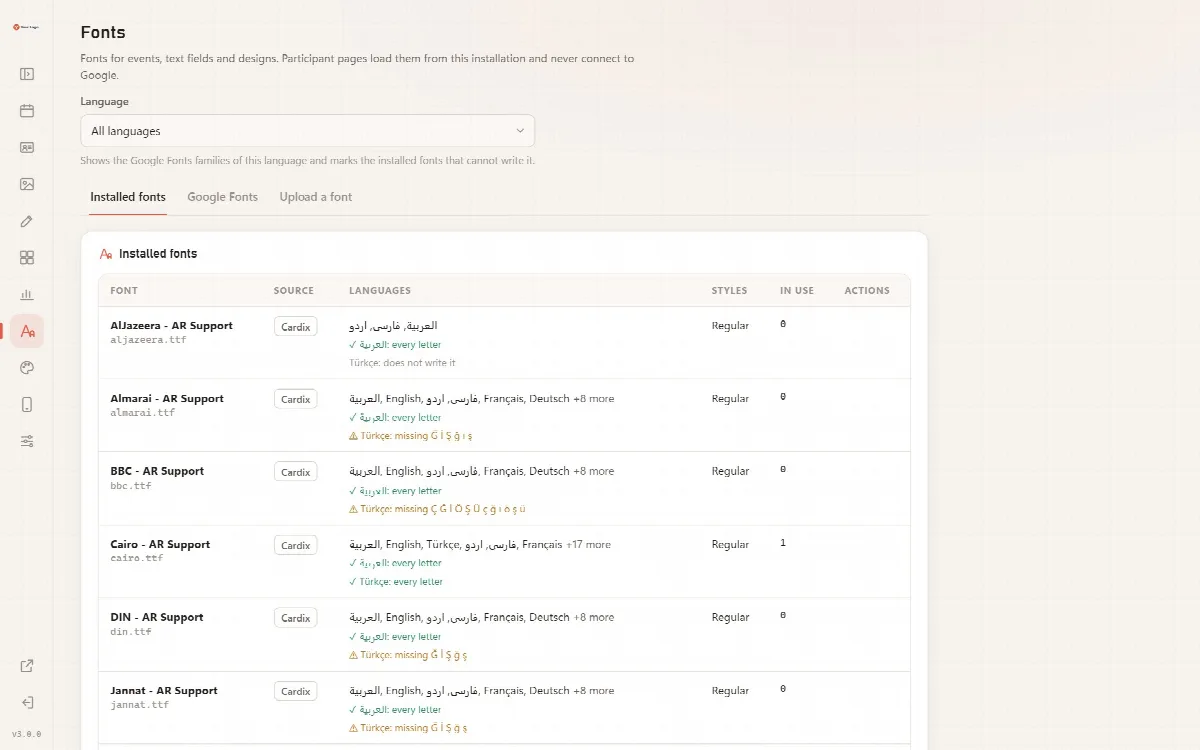
Deleting a font that is in use tells you how many places use it; texts that use it are then drawn with the event's font.
Custom installed fonts
Custom installed fonts lists only the fonts you added: the ones you uploaded and the Google Fonts families you installed, with their source, languages, use and Delete. It also counts your uploaded fonts against the limit. An uploaded font is shown with the name of the file you uploaded.
The font pack of Cardix
Cardix installs its own font pack during setup, with fonts for Arabic and Latin text. New installations use Cairo, which writes all Arabic and Turkish letters, as their default font. Change the default font under Design → Fonts → Default Font.
Install a Google Fonts family
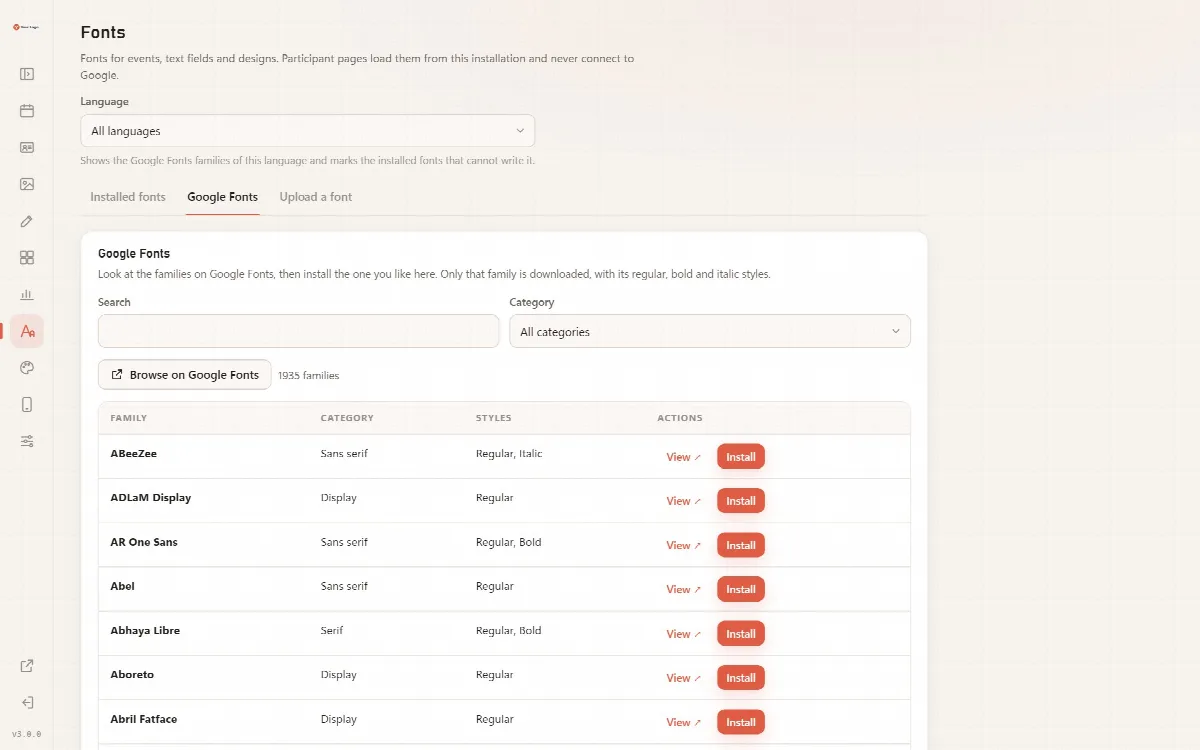
- Open the Google Fonts tab. It lists 1,935 families.
- Choose a Language, type in Search or choose a Category (Serif, Sans serif, Display, Handwriting or Monospace).
- To look at the families first, click Browse on Google Fonts, which opens Google Fonts filtered by the chosen language, or View next to a family.
- Click Install next to the family you want. Cardix confirms: "(family) is installed."
Only the family you install is downloaded, with its regular, bold, italic and bold italic files when the family has them, and stored in Cardix. If the download fails, try again later.
Upload your own font
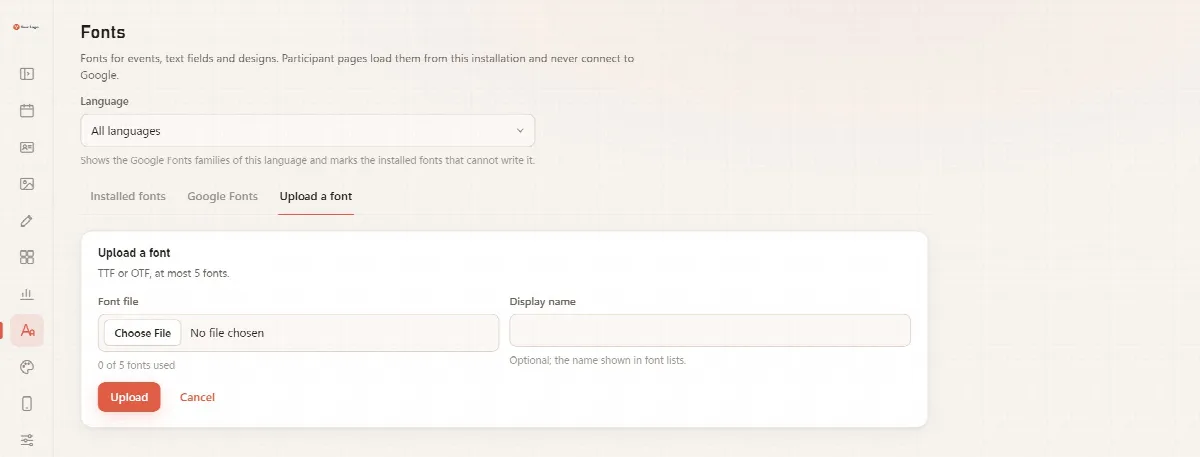
- Open the Upload a font tab.
- Choose the Font file: a TTF or OTF file of at most 20 MB.
- Optionally enter a Display name, the name shown in font lists.
- Click Upload.
You can upload up to five fonts; the tab shows how many are used, for example "2 of 5 fonts used". Installed Google Fonts families do not count towards this limit. The character map of an uploaded font is checked once; a damaged font is rejected and never written, so it cannot break the participant pages.
Where fonts are used
| Place | Setting |
|---|---|
| Whole installation | Design → Fonts → Default Font |
| Event or card group | Font of the event or Font of the group on the General settings |
| Field | Font in the field's settings |
| Box on a design | Font in the Template Editor |
If a participant types a letter the box's font does not have, the whole box is drawn with the default font, or with the first installed font that has all the letters. The Template Editor warns you about missing letters in advance. See Place texts and the logo in the Template Editor.