
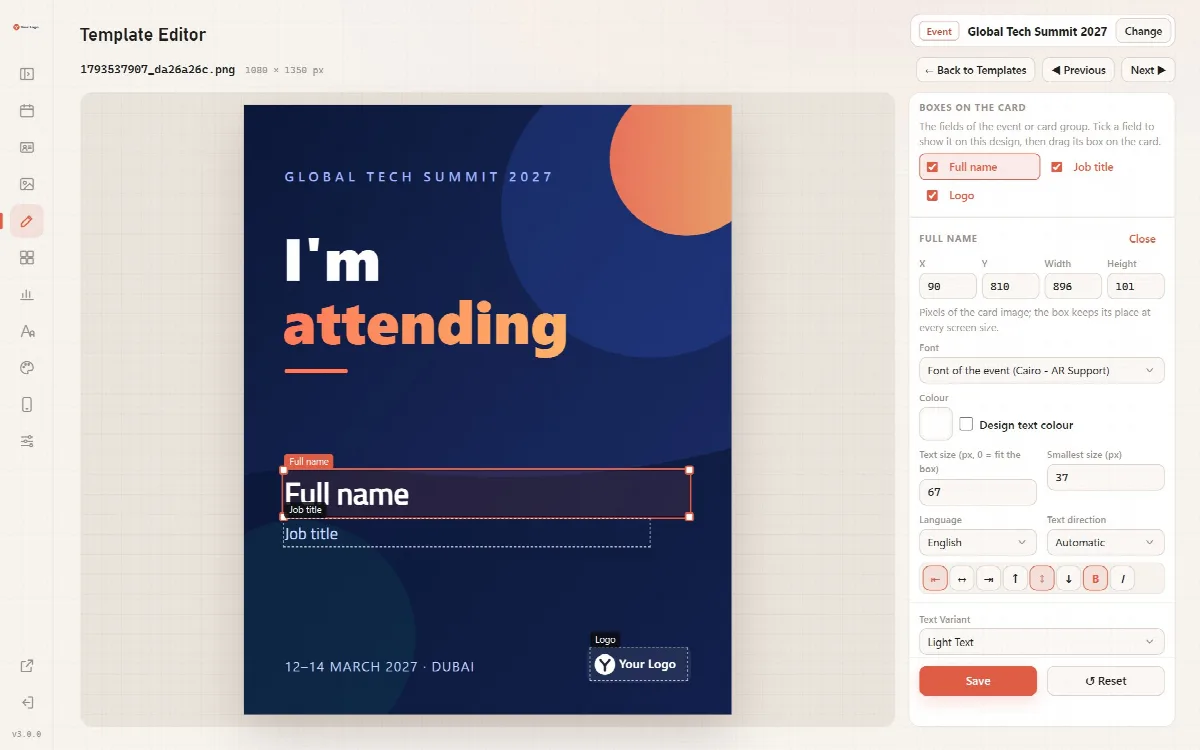
The Template Editor places the fields of an event or card group on each of its designs. Boxes are stored as proportions of the image, so a box stays in the same place in the editor at any window size, on the downloaded card and in the e-mail signature.
Where to find it: Template Editor in the admin menu, or Edit under a design.
Choose what to edit
The editor opens on the event or card group you edited last. Its name is shown at the top with Change, which lists your card groups and events to choose another one. Events and groups without designs show buttons to add one.
After you choose a design, the design appears on the left and the settings on the right. Back to Templates returns to the list of designs; Previous and Next move through the designs of the same event or group.
Place the boxes
- Under Boxes on the card, tick each field this design shows. The list contains the fields of the event or group: text fields, the text box, the logo and, for business cards and Advanced events, the Contact block.
- Drag each box on the card. Resize it from any of its four corners. A box cannot leave the image.
- Click a box to open its settings. X, Y, Width and Height are pixels of the real card image, for example 90, 810, 896 and 101 on a 1080 × 1350 px design.
- Click Save.
Reset returns to the last save. If you leave a design with unsaved changes, the editor asks first: "This design has unsaved changes. Leave without saving?"
A design shows only the boxes you tick. A field that is switched on for the event but not ticked on a design is filled in by participants but not drawn on that design.
Settings of a text box
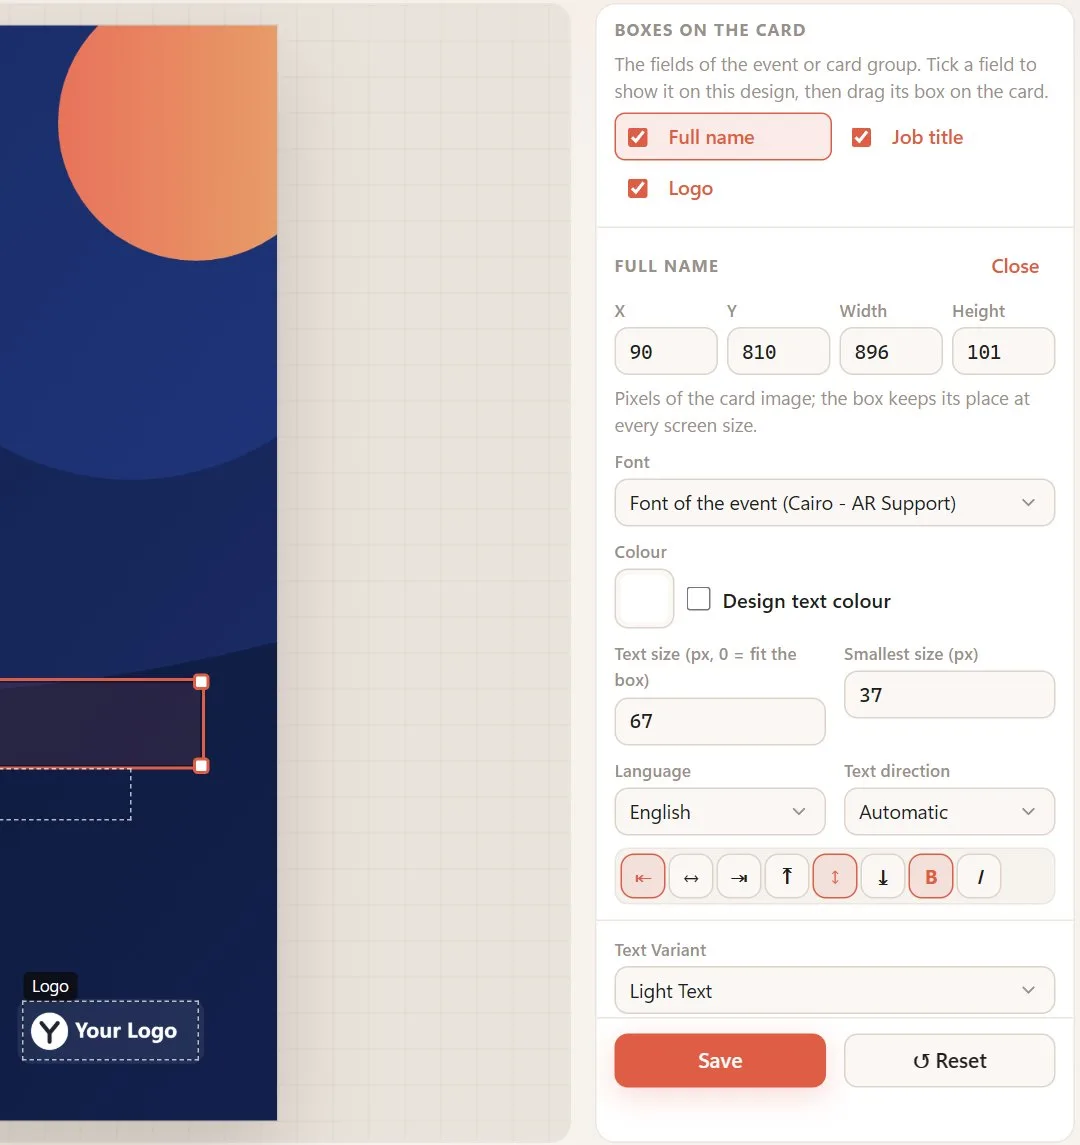
| Setting | Options |
|---|---|
| Font | Font of the event by default, or any installed font |
| Font for Arabic letters | An optional second font: the font above draws the Latin letters, this one the Arabic letters. A letter neither font has comes from the default font of the system |
| Colour | A free colour, or tick Design text colour to use the design's text colour |
| Text size (px, 0 = fit the box) | A size in pixels, or 0 to fit the text to the box |
| Smallest size (px) | The size long text may shrink to |
| Language | The language of the field, or one of 54 languages |
| Text direction | Automatic, Right to left or Left to right |
| Alignment buttons | Left, Centre or Right, and Top, Middle or Bottom |
| Bold and Italic | Bold and italic text |
Long text wraps inside the box and gets smaller, down to the smallest size, when it does not fit. The preview uses the real fonts of the card, including the bold and italic files of a family when it has them.
Align boxes
In an event design, hold Shift (or Ctrl) and click two or more boxes, on the card or in the list, then choose Left, Centre or Right under Align boxes to align them among themselves.
QR code box
An event design can have a QR code box.
- The QR code opens: The participant page of the event, or An address I write with its Address (https://…). Only a public event has a participant page for everybody; for an invitation, write an address.
- Code colour and Background (or None).
The code is drawn in the preview, in the downloaded card and on the invitation page. Keep a strong contrast between the code and its background, and the box large enough, so phones can read it.
Text Variant and Logo Variant
- Text Variant sets the text colour of the boxes that have no colour of their own: Light Text, Dark Text or Auto. The two colours are set on the Design screen (Text color on dark background and Text color on light background).
- Logo Variant in the logo box chooses the logo of the Design screen: Auto, Dark, Light, Colored or None.
Contact block and icons
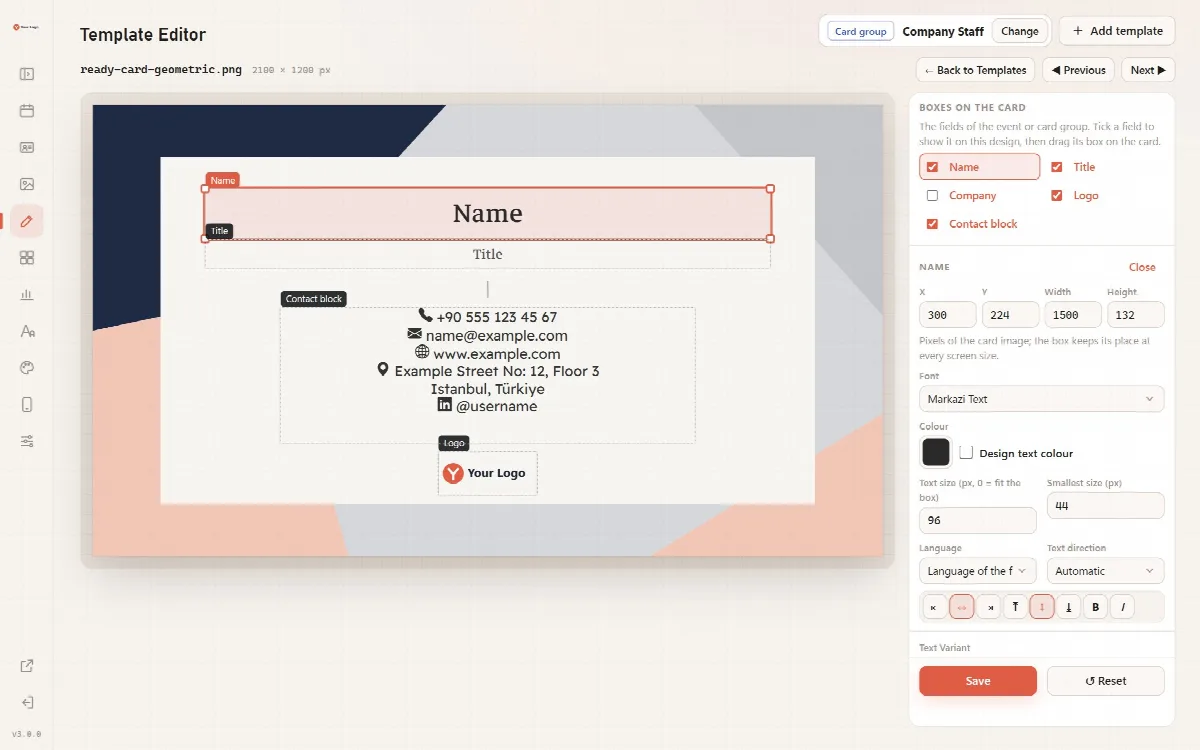
On business cards and Advanced events, phone, e-mail, website, address, city and the social media fields sit in one Contact block.
- Contact lines get icons for phone, e-mail, website and address; social media lines get the real platform icons. Icons are drawn in the text colour of the box.
- Phone numbers, e-mail and web addresses and user names stay left to right inside right-to-left boxes.
- Under Rows of the block, untick a row to give it its own box on the card; tick it again to put it back.
- In its own box, the address wraps to at most two lines and shrinks if needed.
Font warnings
The editor checks the font of each text box:
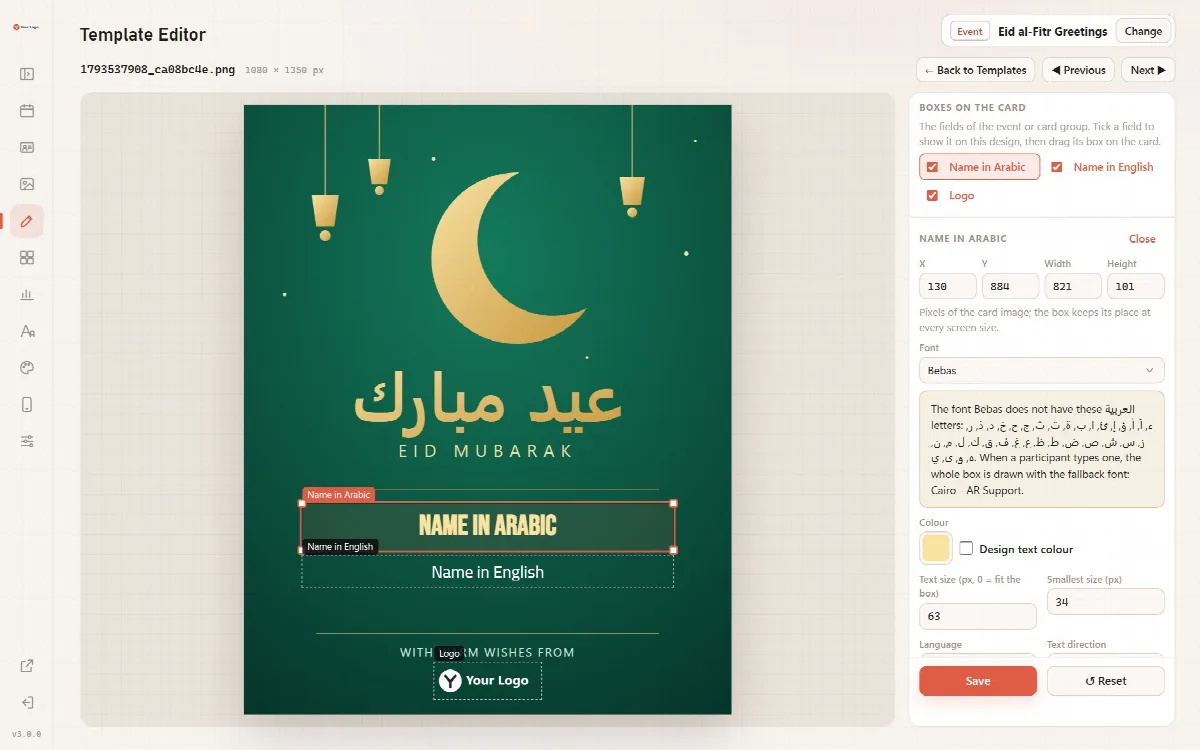
- If the font cannot write some letters of the text shown, or some letters of the field's language (for example Arabic or Turkish), the editor lists those letters and names the fallback font that will be used instead.
- On the card, if a participant types a letter the box's font does not have, the whole box is drawn with the default font, or with the first installed font that has all the letters.
- If a Google Fonts family of a ready template could not be installed, the editor shows "Font not installed" with a Try again button.
Orientation check
If an Advanced event has a Design orientation (Portrait or Landscape), the editor warns when a design does not match, for example "This event is portrait, but this image is landscape." The design is still kept.
A practical design workflow
- Open the Template Editor; it shows the event or card group you edited last.
- Choose a design and tick the fields it shows under Boxes on the card.
- Drag each box into place and set its font, colour, size and alignment.
- Check the font warnings for the languages of the fields.
- Click Save, then make a test card on the participant page.