
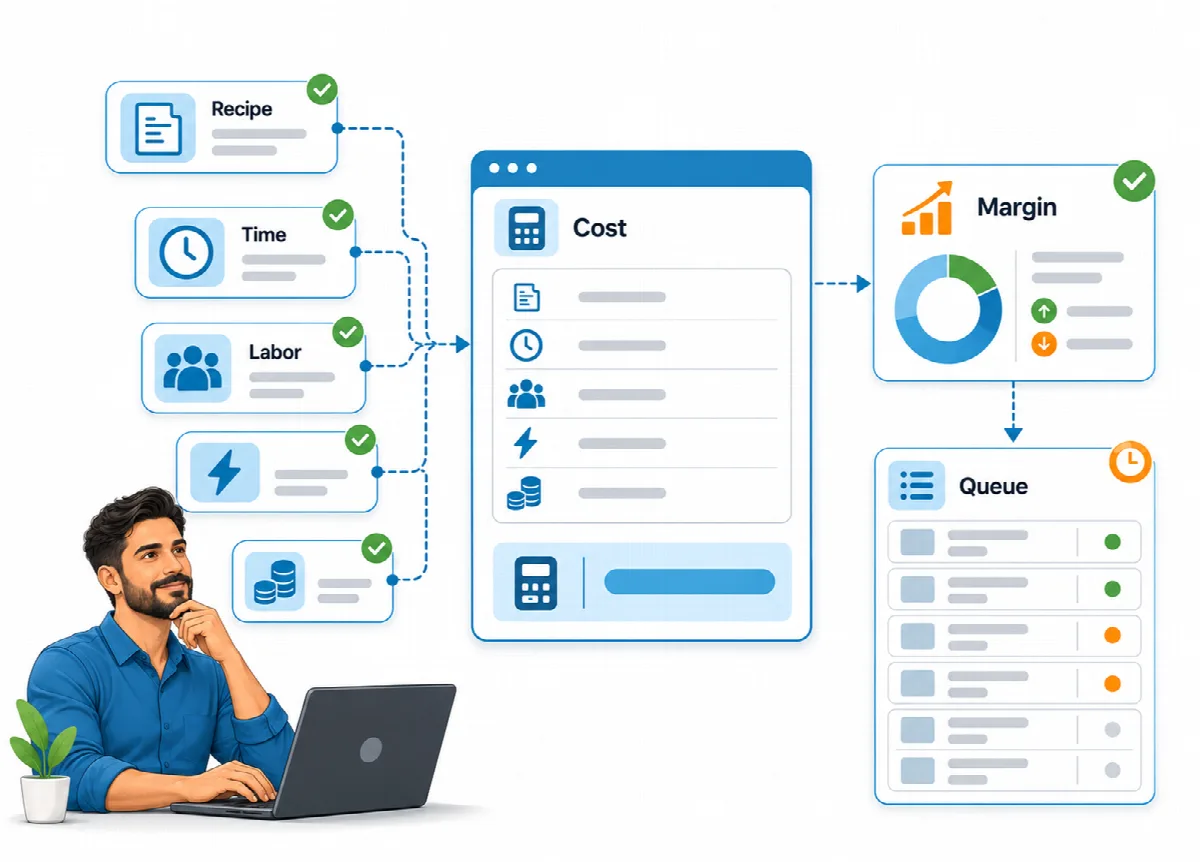
Every product in Eagle3D has a recipe: the filament and printer it uses, the part weight and waste in grams, the print time, the labour time and any additional materials. The cost engine turns this recipe into a full cost, so you can set prices on real costs instead of the filament you can see.
Where to find it: Production → NEW PRODUCT for a new product, Production → PRODUCTS for the list.
Before you start
- Add at least one printer and one filament. See Printers, filaments, materials and suppliers.
- Fill in the cost settings (electricity price, labour rate, repair rate). See Cost settings, overhead, sales channels and staff costs.
Fill in the product form
Fields marked * are required.
| Field | What to enter |
|---|---|
| Product Name * | The name shown in orders, quotes and on the order page |
| SKU | Optional, but unique. Needed to match products imported from a web store. |
| Category | From Settings → Values → Product Categories; also the tab on the order page |
| Weight (g) * | The weight of the finished part |
| Waste (g) * | Supports, purge and brim, in grams (0 if none) |
| Print Time (hours) * | The printing time of one part |
| Sales Price * | Your price, including tax |
| Labor Time (minutes) | Hands-on time for one part (post-processing, assembly) |
| Filament * | One filament per recipe; its price per kg comes from the default supplier |
| Printer * | The printer used; it brings watt, depreciation, failure rate and maintenance |
| Description | Shown on the order page, up to 500 characters |
| Product images | Up to 5 images for the order page |
| Show on the online order page | Used when the order page shows only selected products |
| Additional Materials | Add Material for magnets, paint, packaging and similar, with the quantity per part |
| Enter overhead manually | Replaces the automatic overhead share with a fixed Manual Overhead Amount for this product |
Click Save Product. A recipe without a weight, a print time, a filament and a printer is not saved: "Enter the weight, print time, filament and printer: the cost cannot be calculated without them."
The hint under Labor Time (minutes) shows the business-wide labour rate: "Uses the business-wide labor rate set in Settings > Cost Settings:" followed by the rate. Change the rate in Settings → Cost Settings → Labor Rate (per hour).
The cost preview
While you edit, the Cost Preview shows Filament Cost, Waste Cost, Energy Cost, Materials Cost, Labor Cost, Printer Depreciation, Repair Allowance and Overhead, then Total Cost and Profit with a percentage. A negative profit turns red.
The cost engine calculates the preview from the values in the form, exactly as it calculates the product list: it applies the printer's failure rate, adds the automatic overhead share (or the Manual Overhead Amount when Enter overhead manually is ticked) and calculates profit on the price without tax. The percentage is the markup: profit compared with total cost. The figures update a moment after you stop typing. See How Eagle3D calculates cost and profit.
The product list
Production → PRODUCTS lists each product with SKU, Product Name, Printer Name, Weight (g), Print Time (hours), Total Cost, Profit, Markup / Margin and Status.
- Figures come from the cost engine, including the failure rate, the overhead share and tax.
- Prices are treated as tax-inclusive: profit is calculated on the price without the active tax rate.
- A negative profit is shown in red, so a below-cost price stands out.
Check the list after you change filament prices, rates or overhead; it always shows today's values.
Deactivate or delete a product
A product that appears in orders cannot be deleted ("This product has orders and cannot be deleted. You can deactivate it instead."). Deactivate it instead: inactive products no longer appear in new orders or on the order page, and their history stays complete. Quotes and orders that already contain the product keep the line with its amount; when you edit them, the product is listed as "(Inactive)".