
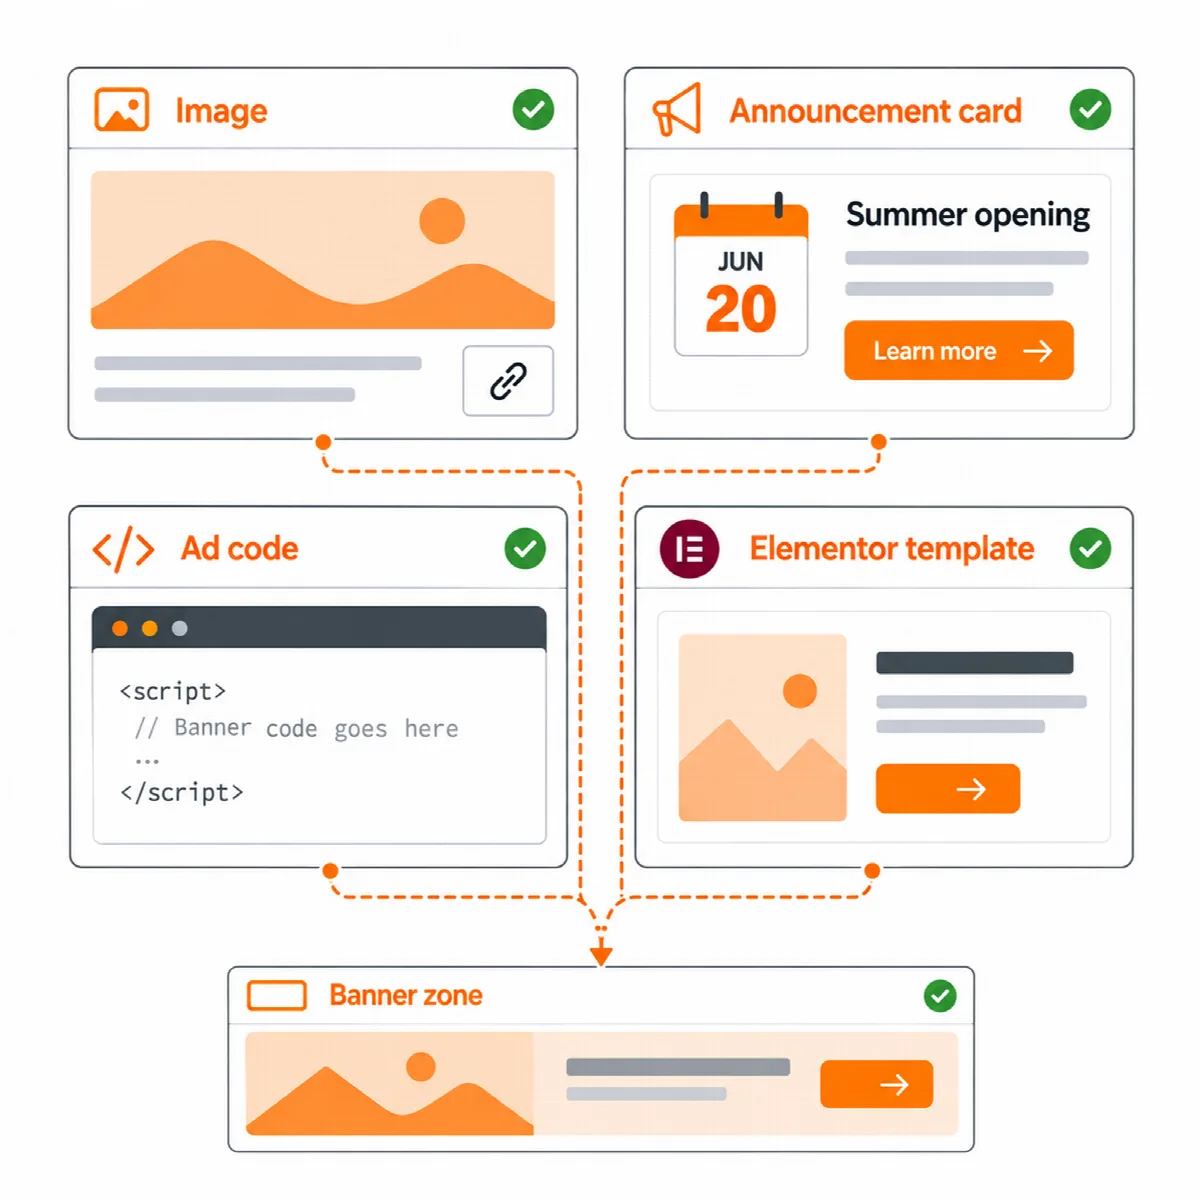
The Banners module shows image banners, announcement cards, ad code and Elementor templates in zones. A banner is what shows; a zone is where and how it shows: in the page at a size you set per device, or as a pop-up, slide-in or sticky bar. Banners can be scheduled, limited by display rules and devices, and counted by daily views and clicks.
Where to find it: turn the module on in ARN Vendix → Smart Features → Banners, then work in ARN Vendix → Banners, which has the tabs Banners, Zones and Statistics. Banners is part of Vendix Pro and needs the permission to edit theme options.
Turn on the module
- Open ARN Vendix → Smart Features and choose the Banners tab.
- Turn on Enable Banners. Optionally keep Count views and clicks of each banner on, and choose whether to count the visits of users who can manage banners.
- Click Save Vendix Settings. ARN Vendix → Banners appears.
While the module is off, nothing of it loads: zones, the ARN Banner widget and the [arn_banner] shortcode print nothing, and pages that use them do not show the shortcode text.
Create a zone
A zone has one of four formats:
| Format | How it shows |
|---|---|
| In the page | At a width (pixels, %, vw or rem) and an aspect ratio such as 728:90 or 16:9, or a fixed height, per device. The space stays free before the banner loads, so the page does not jump. An empty device takes the value of the next larger device. |
| Pop-up | A box in the middle of the screen or a full-screen layer |
| Slide-in or half page | A corner box or a half-page panel at the start or end side, or a half page at the bottom |
| Sticky bar | A bar fixed to the top or the bottom of the screen |
- In ARN Vendix → Banners, open Zones and click Add zone.
- Enter a name. The Shortcode name is made from it when empty. Pages that use an old shortcode name lose the zone when you change it.
- Choose the format and set its size or position.
- For pop-ups, slide-ins and bars, set the delay (0 to 600 seconds) and how often they appear: On every page view, Once per browser session or Once every N days.
- When the zone holds more than one banner, choose the rotation: Random, Random by weight (each banner gets a weight from 1 to 100), In turn (the next one on each page view) or Slider (all of them, 2 to 60 seconds each, with previous, pause and next buttons).
- Choose the zone's automatic places and display rules if you want (see below), then save.
Create a banner
A banner has one of four types:
| Type | What it shows |
|---|---|
| Image | One image per device. The desktop image shows everywhere unless a tablet (up to 1024 px) or phone (up to 767 px) image is chosen. Optional link, alternative text, new tab and sponsored or nofollow marks |
| Announcement card | An image, a date line, a title, a text, an optional countdown and a button; without a button text, the title becomes the link |
| Ad code (HTML / JavaScript) | Code from an ad network such as Google AdSense or Google Ad Manager, or any HTML; it starts only when its banner is shown |
| Elementor template | A banner designed in Templates → Saved Templates with Elementor |
- Open Banners and click Add banner.
- Choose the type and fill in its fields.
- Under When and where, set an optional Start and End in the site time zone, the devices, Do not show to logged-in users and the pages.
- Under Show in zones, tick the zones the banner belongs to.
- Click Save banner. A banner saved as Draft (does not show) stays hidden.
Note: Scripts in ad code are kept only when the account that saves the banner may post unfiltered HTML. For other accounts, scripts and other unsafe markup are removed when the banner is saved.
Place a zone
Size, rotation, timing and rules come from the zone and its banners, so a zone looks the same wherever you place it:
- Shortcode:
[arn_banner zone="…"]shows a zone;[arn_banner id="…"]shows one banner. - ARN Banner widget: an Elementor widget that shows a zone or one banner. In the editor, every banner of the zone shows in place; ad code shows as a placeholder.
- Header & Footer element: the Banner zone element of the Header & Footer Builder.
- Automatic places: before or after the post content, after paragraph number N, in post lists after every N posts (classic themes), or over the page by itself for pop-ups, slide-ins and bars.
- Vendix Theme places: above the header, beside the logo, under the header and above the footer, and before and after the post text with the News site type.
- News Blocks: with the Newspaper module, a zone after every N items in the grid and simple list layouts.
- Custom slots: a zone that lists a slot name prints wherever a theme or plugin calls
do_action( 'arnvx_banner_slot', 'slot-name' ).
Places in the content work on single posts and pages. The paragraph place skips pages built with Elementor, and a text with fewer paragraphs does not show that zone.
Show an announcement bar on every page
From Vendix 3.0.0, the ARN Announcement Bar widget can run site-wide through a sticky bar zone:
- In Templates → Saved Templates, create an Elementor template and add an ARN Announcement Bar widget to it.
- In ARN Vendix → Banners, add a banner of the Elementor template type that uses this template.
- Add the banner to a zone with the Sticky bar format and set the zone's display rules.
The zone's rules decide where and when the bar shows, and the bar's close button closes the zone. When a page also has a sticky ARN Announcement Bar (Sticky at top), a Banners top bar on that page sits below it.
Display rules
Zones and banners both have rules, and a banner shows only where both allow it.
- Show on (leave empty for every page) and Do not show on, with the same choices as the Header & Footer Builder: entire site, front page, blog page, search results, 404 page, single and archive views of a content type, a chosen page, a category or tag, and the WooCommerce shop, product, cart, checkout and account pages. A matching Do not show on rule always wins.
- Pages and their child pages (Vendix 3.0.0 and later): a chosen page and every page under it, also pages added later.
- Devices: desktop, tablet and phone.
- Start and end times also work on pages served from a full-page cache.
On a plain checkout of Vendix Theme, zones with broad rules stay off; zones set for the checkout page still show. A bottom bar, Floating Contact, the sticky add to cart bar and the back to top button share the bottom corner without covering each other.
Read the statistics
Each banner counts its views and clicks per day. The Banners list shows views, clicks and the click rate of the last 30 days, and the Statistics tab shows the totals of the period you choose.
- A view counts when at least half of the banner is on screen, once per page view. A click on the banner's link counts once per page view.
- Views and clicks are sent together when the visitor leaves the page, so cached pages are counted too. Search engine bots are not counted.
- Daily statistics are kept for 365 days by default, adjustable from 30 to 1,825 days.
- Clicks inside ad code cannot be counted, because they happen in the ad network's own frame. Use the ad network's reports for those.