
Follow these steps once after you activate Vendix Theme. If you ran the guided setup of the Vendix plugin, some of them are already done; check them anyway.
1. Choose the site type
- Go to Appearance → Customize → Vendix → Site Type.
- Under Site type, choose Business / Corporate, Store or News / Magazine.
- Click Publish.
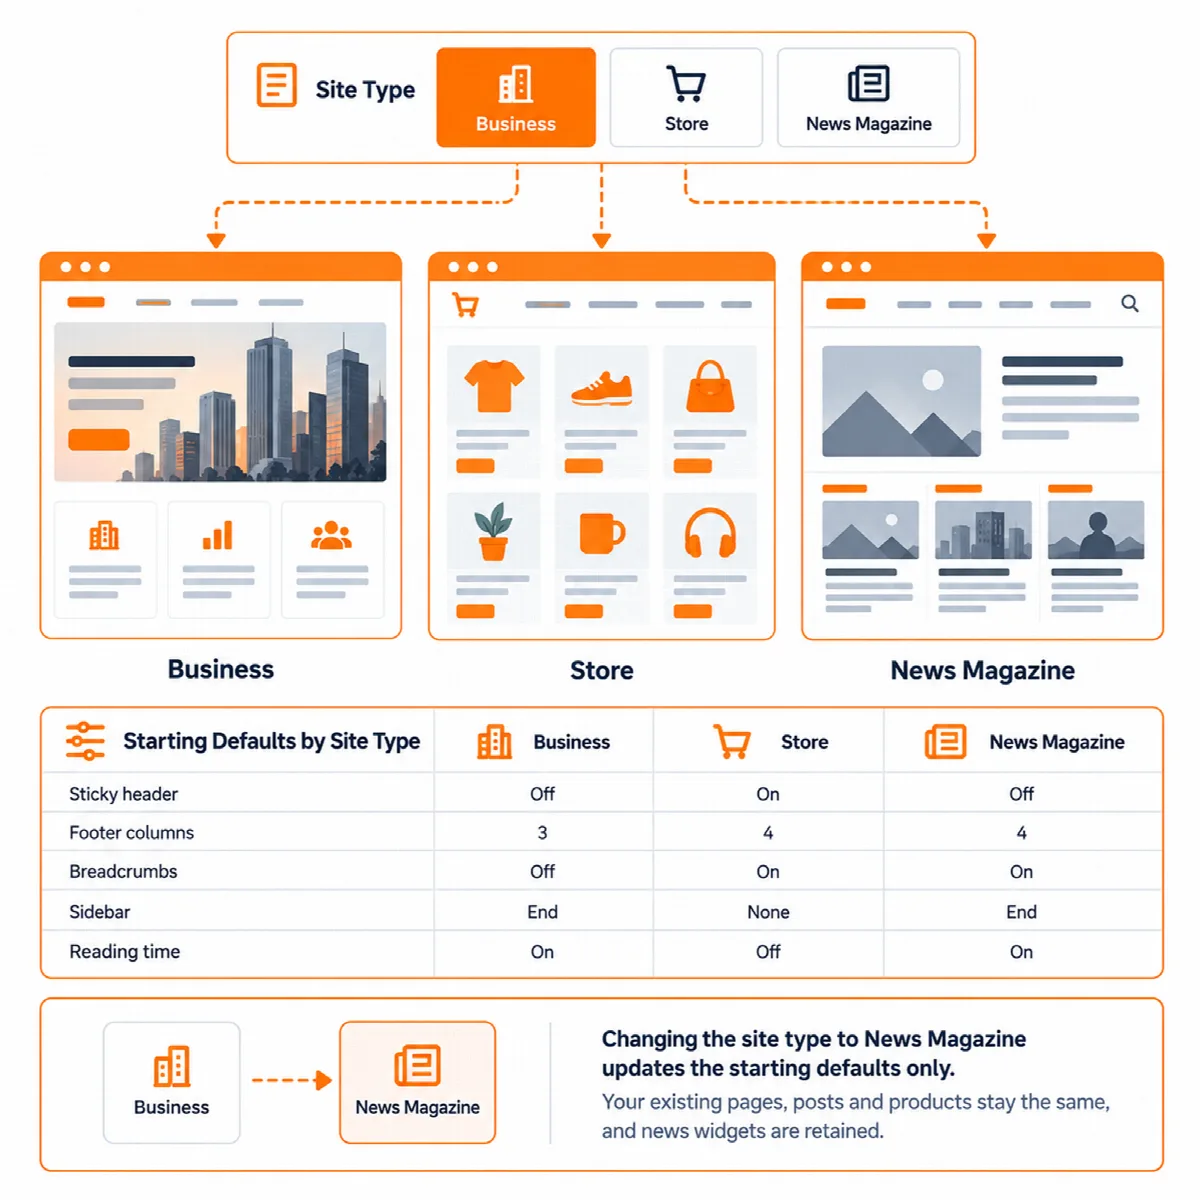
The site type sets the starting values of the sticky header, footer widget columns, breadcrumbs, blog sidebar and reading time, and of the store and news options. Options you have saved keep their values, and no content changes. The preview shows the new values at once; the other Customizer sections show them after you publish and reload the Customizer. See Choose a site type.
2. Add your logo and menus
- Logo: add it under Appearance → Customize → Site Identity. Without a logo, the header shows the site title. To show the tagline under the site title, turn on Show the tagline under the site title in Customizer → Vendix → Header & Footer.
- Menus: in Appearance → Menus, assign a menu to each location you need:
| Menu location | Where it appears |
|---|---|
| Header | The main menu in the theme header |
| Footer | The footer menu, below the footer columns |
| Top Bar (News / Magazine site type only) | The top bar above the header on news sites |
The theme header shows a menu only when one is assigned to the Header location.
3. Set colors and fonts in one place
Vendix Theme has neutral base styles and no color or font panel of its own:
- On an Elementor site, set colors and fonts in Elementor Site Settings.
- With the Vendix plugin, turn on its Design System. While it is on, the theme colors and the block editor palette follow its colors, and with Vendix Pro the text, headings and theme menu also follow its element typography.
See Colors, fonts and Elementor.
4. Check the header, footer and page title
In Customizer → Vendix:
- Header & Footer: decide whether the header stays at the top while scrolling, whether it is transparent on full width pages, and whether it has a button. Choose the number of footer widget columns and write the footer text.
- Page Title: choose the title alignment, the title area style and the breadcrumbs.
- Layout: set the container width (1140 px by default).
Then add widgets to Footer Column 1 to 4 in Appearance → Widgets. A column appears only when it has widgets.
See Set up the theme header and Footer, page title and breadcrumbs.
5. Set up the blog, store or news options
- Blog and Posts: post list layout, card items and post page options, on every site type. See Post lists and post cards.
- Store: appears in Customizer → Vendix while WooCommerce is active. See Set up WooCommerce store pages.
- News: appears while the site type is News / Magazine. See News and magazine options.
6. Build one page and check it on a phone
- Create a page and edit it with Elementor, or with the block editor if you do not use Elementor.
- Open the Page Layout options of the page, in the Elementor page settings panel or in the box on the edit screen, if the page needs a hidden title or a full width layout. See Page Layout options and site-wide layout.
- Publish the page and open it on a phone. Check the header, the phone menu, the footer and the page title.