
After activation, Vendix Theme adds a welcome page under Appearance → Vendix. It shows the way to a ready site: the plugins the theme recommends and the guided setup of the Vendix plugin. The theme itself installs nothing; every install and activation happens on WordPress's own screens when you click.
Where to find it: Appearance → Vendix. You can come back to this page at any time.
Start the guided setup
The guided setup belongs to the Vendix plugin (Vendix Free or Vendix Pro). It asks what kind of site you are building and prepares it for you. Nothing is changed until you choose.
- Open Appearance → Vendix.
- Click Start setup. The guided setup of the Vendix plugin opens.
- Follow the steps of the setup. When it is finished, the theme's setup notice no longer appears.
If both Vendix Free and Vendix Pro are active, Start setup opens the setup of Vendix Pro.
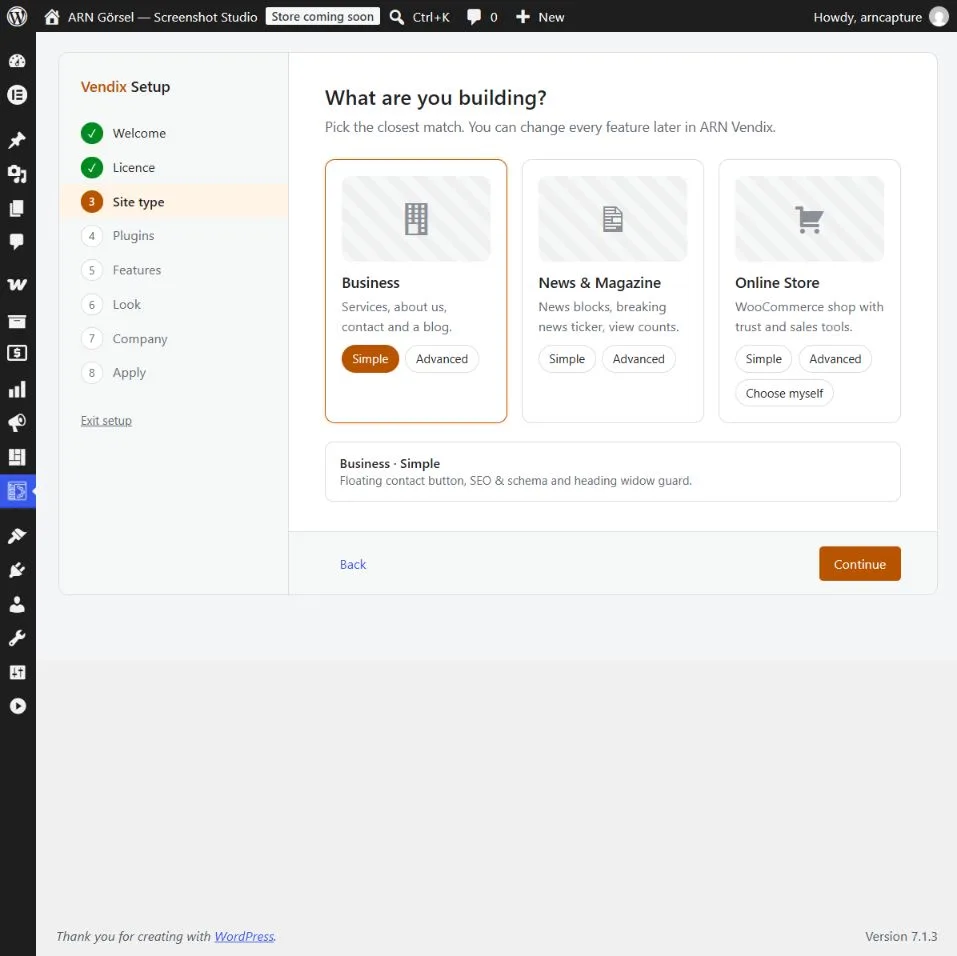
With Vendix Theme active, the setup of the Vendix plugin:
- suggests the theme's site type (Business, Store or News) as the starting choice;
- sets the theme's site type to the type you choose;
- puts the menu it creates in the theme's Header menu location.
"Undo setup" in the Vendix plugin brings back the earlier site type and menu locations. For the steps of the setup itself, see the Vendix plugin documentation.
When Start setup is greyed out
Start setup works only when an active Vendix plugin gives the address of its setup. The note under the button tells you why it is greyed out:
| Note | What to do |
|---|---|
| Install and activate Vendix to start the setup. | Install and activate Vendix Free from the Recommended plugins list, or upload Vendix Pro. |
| Ask a site administrator to run the guided setup. | Your account cannot run the setup. An administrator has to start it. |
| Update Vendix to start the guided setup. | The active Vendix version has no guided setup yet. Update the Vendix plugin. |
Recommended plugins
The Recommended plugins list has one row per plugin. Each row ends with a button or a status:
| Plugin | Description on the page |
|---|---|
| Elementor | Page builder used by Vendix. |
| ARN Smart Site Utilities for Elementor | Free widgets, Header & Footer, Design System. |
| WooCommerce | Only for an online store. |
| Button or status | Meaning |
|---|---|
| Install | Opens WordPress's own install screen for the plugin. |
| Activate | The plugin is installed; the button activates it through WordPress. |
| Activate Vendix Pro | Vendix Pro is installed but not active. It replaces Vendix Free, so you can activate it instead. |
| Active | The plugin is active. |
| Vendix Pro is installed; not needed | Shown in the Vendix Free row while Vendix Pro is active. |
| Asked in setup | WooCommerce is not active. The guided setup asks for it when you build a store. |
| Installed, not active / Not installed | Your account cannot install or activate plugins. Ask a site administrator. |
If you have Vendix Pro and it is not installed yet, the page shows "Have Vendix Pro? Upload it; the setup then continues in Vendix Pro." The Upload it link opens Plugins → Add Plugin → Upload Plugin.
Set up the site yourself
If you do not want the guided setup, click Skip, I will set it up myself. The setup notice closes for your account and you return to the Dashboard. Then continue with First steps after installing Vendix Theme.
The setup notice
After activation, a notice appears on the Dashboard and on the Themes, Menus and Widgets screens: "Vendix is active. Start the guided setup to install the plugins your site needs." Its link opens the welcome page.
The notice stops appearing when:
- you close it with its close button;
- you click Skip, I will set it up myself on the welcome page;
- the Vendix plugin reports that its guided setup is finished.
Closing the notice applies to your own user account. Other administrators still see it until they close it.
Note: Vendix Theme has no demo import. The guided setup of the Vendix plugin prepares the site; the theme only links to it.