
Vendix organizes its WooCommerce features as store modules. Each one has its own tab and switch, stays off until you turn it on and loads its files only on the pages where it works. This article explains how the store modules are organized and covers the four catalogue and checkout tools: Store Type, Product Identifiers & Cost, Bulk Brand & Category Assign and Delivery Area Rules.
Where to find it: ARN Vendix → WooCommerce (Pro) or ARN Utilities → WooCommerce (Free). The store modules need an active WooCommerce installation; while WooCommerce is off, their tabs show a notice and nothing loads on the site.
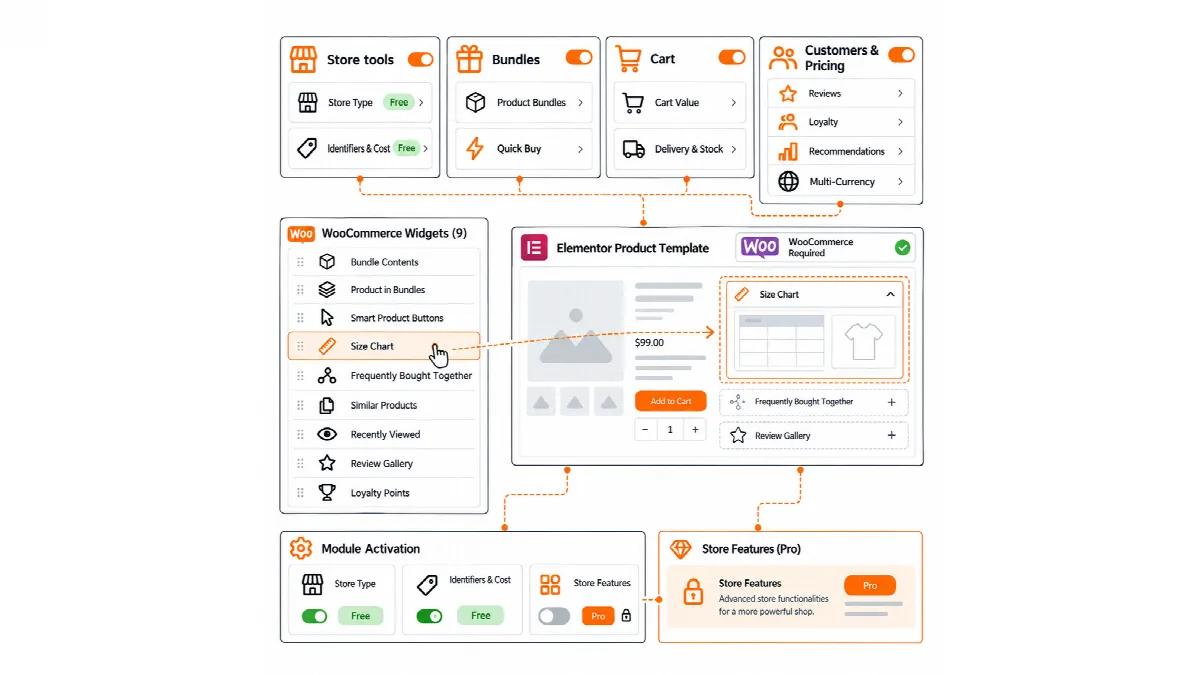
The store modules at a glance (Pro)
On wide screens the tabs of ARN Vendix → WooCommerce form a grouped menu on the left; on small screens they become a drop-down list.
| Group | Tabs | Explained in |
|---|---|---|
| Store | Store Type, Product Identifiers & Cost, Profit Report, Bulk Brand & Category Assign, Store Features, Size Charts, Delivery Area Rules | This article; profit report; store features; size charts |
| Sales | Product Bundles, Quick Buy Buttons, Cart Value, Order Limits, Delivery & Trust, Delivery Slots, Shipping on the Product Page, Smart Recommendations, Store Analytics, Quotes | Bundles; order limits; cart and delivery; recommendations; store analytics; quotes |
| Customers | Stock & Demand, Photo & Video Reviews, Review Summary, Product Questions, Loyalty Points, Shipment Tracking, Customer Order Changes, Returns & Exchanges, Documents, Contracts | Stock alerts; reviews, questions and loyalty; tracking; returns and order changes; documents |
| Pricing | Lowest Price, Discount Rules, Multi-Currency with its Pricing Zones | Lowest price; discount rules; multi-currency; pricing zones |
Vendix Free has Store Type and Product Identifiers & Cost, and from Vendix Free 3.0.0 also Order Limits, Quantity Discounts (the quantity tiers of Discount Rules), Pricing Zones (a percentage per zone), Customer Order Changes, Shipping on the Product Page, Product Interest (views and adds to cart) and Product Questions, in ARN Utilities → WooCommerce. Everything else in this table is part of Vendix Pro. Turn on one module at a time and test the shop, a product page, the cart and the checkout after each one.
From Vendix 3.0.0, the store modules follow one order on the product page before the short description: the price, the discount information, the price drop link, "What customers say" and the loyalty points line.
Store Type
Store Type matches the WooCommerce product editor to how your store sells, so it stops recording data you never use.
| Store mode | What it does |
|---|---|
| Mixed Store | Physical, virtual and downloadable products are left alone |
| Physical Store | Virtual and Downloadable are removed from the product editor, and products stay physical on every save, including quick and bulk edit, imports and the REST API; the order screen also hides the Downloads box |
| Virtual Store | New products start as Virtual |
| Digital Store | New products start as Virtual and Downloadable |
- Open the Store Type tab and turn on Enable Store Type control.
- Choose the Store mode.
- Under Allowed product types, choose which of Simple, Variable, Grouped and External/Affiliate can be chosen for new products. This is independent of the store mode.
- Optionally turn on Stop saving variation price-cache and version meta; WooCommerce rebuilds that data by itself when it needs it.
- Save.
Saving never rewrites existing products. In Vendix Pro, Scan existing products counts the products and variations that do not match the mode, and Convert matching products now updates them 20 at a time with a progress bar, only after you start it. The conversion changes only the virtual and downloadable flags, never product content.
Product Identifiers & Cost
Product Identifiers & Cost adds eight independent fields: MPN, Barcode / GTIN, GTIP / Customs Tariff Number, Manufacturer, Supplier, Cost, Shipping Cost and Other Costs.
- Open the Product Identifiers & Cost tab and turn on only the fields your store uses.
- For each field, set the Field label and choose Show on variations, Show as list column, Show in Quick Edit and Required (shows a reminder if left empty).
- For identifier fields, choose Show on the frontend and Add to structured data (MPN, GTIN and Manufacturer map to their Schema.org properties).
- Save, then open a product of each type you sell and fill in the fields.
- Barcode / GTIN uses WooCommerce's own Global Unique ID field when your WooCommerce version has it, so no duplicate field is created.
- Cost works the same way with WooCommerce's own Cost of goods (Vendix 3.0.0 and later): while WooCommerce's Cost of Goods Sold feature is on (WooCommerce → Settings → Advanced → Features), the Cost field is WooCommerce's Cost of goods field, and a cost saved earlier in Vendix is read while WooCommerce's field is empty. Shipping Cost and Other Costs stay Vendix fields.
- Cost, Shipping Cost and Other Costs are internal only. No setting shows them on the site or in structured data. The Profit Report (Pro) saves them with each new order; see WooCommerce store analytics, product interest and the profit report.
- With Cost on, the product editor shows a live margin estimate as you type. The products list shows the cost with the net margin after tax, calculated with WooCommerce's own pricing logic; for a variable product, the list shows the cost range of its variations. The margin is calculated each time and never stored.
- While Yoast SEO, Rank Math, SEOPress, AIOSEO or The SEO Framework is active, Vendix leaves the Product structured data to that plugin.
These fields are not an accounting or tax-reporting system.
Bulk Brand & Category Assign (Pro)
This tool adds a Bulk assign bar to the WooCommerce products list.
- In the Bulk Brand & Category Assign tab, turn on Enable bulk assign on the products list and save.
- In Products → All Products, tick the products.
- In the Bulk assign bar, add them to a category, remove them from one, replace their categories, or set or remove their brand.
One change covers up to 500 products, and products you cannot edit are skipped. Each change keeps the previous categories or brand, and the last five changes can be undone from the same bar. A product that loses its last category moves to the store's default category. Brand changes need a brand taxonomy, such as WooCommerce Brands or a common brand plugin.
Delivery Area Rules (Pro)
Delivery Area Rules decide which addresses the store delivers to.
- Open the Delivery Area Rules tab and turn on Enable Delivery Area Rules.
- Choose the policy: Deliver everywhere except the blocked areas or Deliver only to the allowed areas.
- Add rules by country, province or state, district or city, neighbourhood and postcode. Postcodes can be exact (34000), a prefix (34*) or a range (34000-34999). You can add up to 100 rules.
- Write the message for refused addresses, and optionally a message per rule.
- Save, then test a served address, a blocked address and an edge-case postcode at checkout.
A rule matches only when every field it fills in matches the address. Districts and neighbourhoods are matched by the words the customer types, without regard to accents or capital letters, and a block rule always wins over an allow rule. For a refused address, the classic checkout and the Checkout block remove the shipping methods, show your message and do not take the order.
Shipping methods and costs still come from your WooCommerce shipping zones. Estimated delivery dates and delivery slots are separate modules; see WooCommerce cart value, delivery estimates and delivery slots.