
Contix does not include AI usage. It sends research, writing and analysis requests to the AI provider you choose, with your own account. Set up this connection before the first topic: research and writing do not work without it.
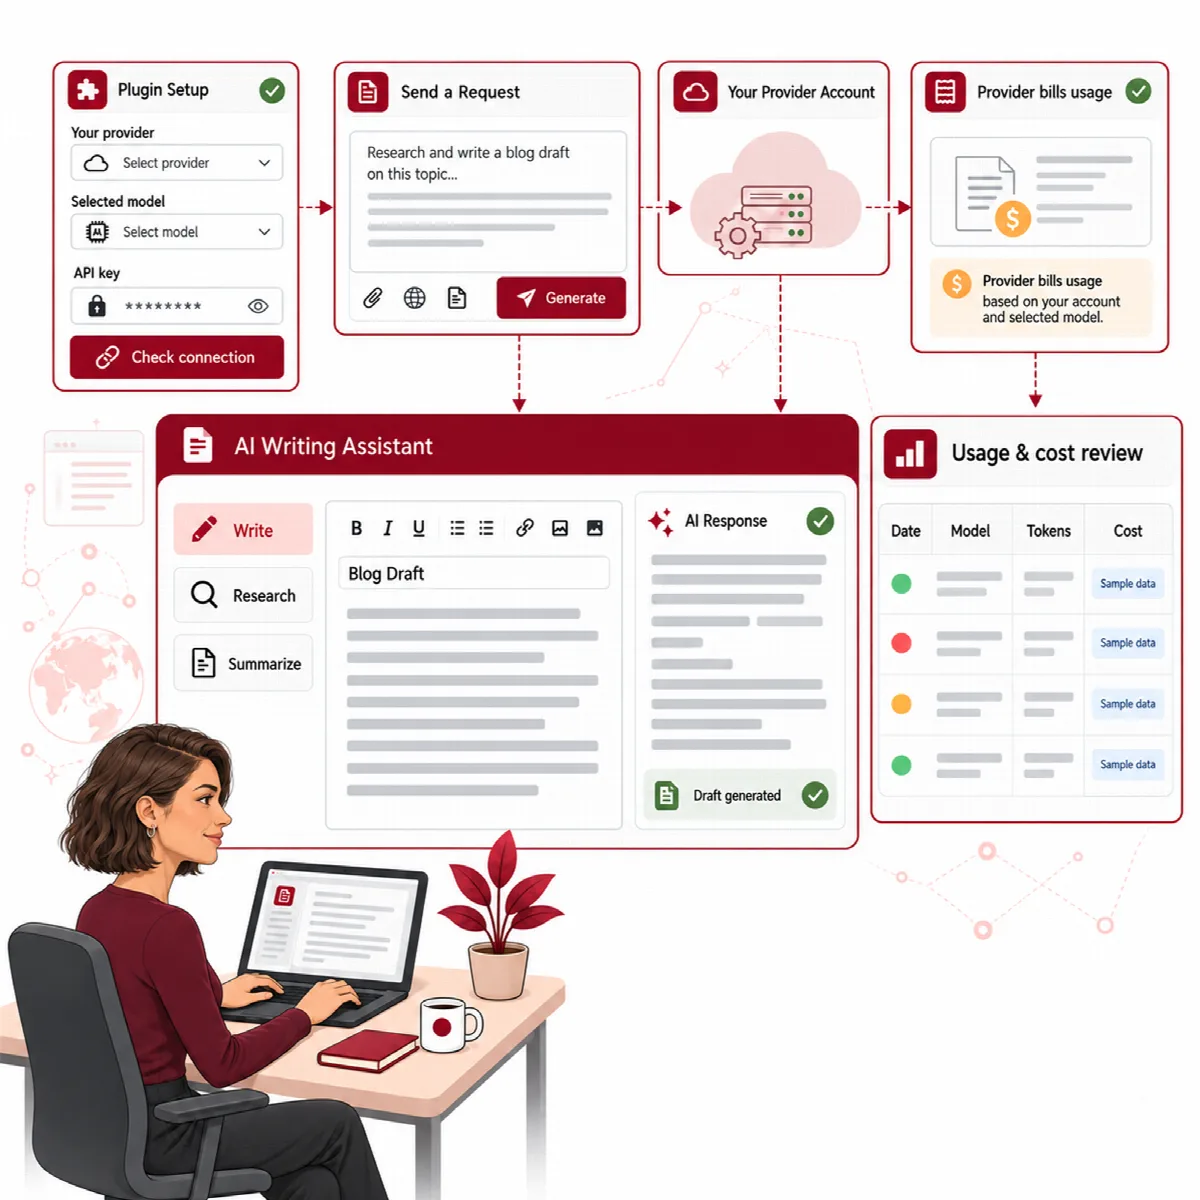
Contix Pro: connect AI in ARN Center
Contix Pro uses the shared ARN Smart AI connection of your ARN Pro products. Open Settings → ARN Center, or in Contix go to System → Settings and click Open shared AI settings. The page has the tabs Connection, Model prices, Usage & limits and Licences.
1. Choose your AI engine
On the Connection tab, under Choose your AI engine:
- WordPress AI is the default. It uses the Connectors already set up in WordPress (Open WordPress Connectors) and needs a compatible WordPress AI Client. No API key is copied into ARN Smart.
- ARN Smart AI uses your own provider connections: OpenAI, Anthropic (Claude), Google Gemini, DeepSeek, Kimi or a custom OpenAI-compatible endpoint.
The selected engine is used by every connected ARN product on the site. An unavailable connection does not switch to another engine on its own.
2. Add and test a connection (ARN Smart AI)
- Open Add a connection.
- Enter a Connection ID (lowercase letters, digits,
-and_) and a Connection name, and choose the Provider. - Paste the API key. For a custom endpoint, also enter its Custom HTTPS base URL.
- Click Load models and select a model, or enter its ID under Model for this provider.
- Click Test and save. A successful test is required before the connection is saved.
Testing sends one small text request, which your provider may charge. Keys are stored encrypted and are never displayed again.
3. Choose the text model
Under Text model, choose the Text connection and enter the exact Text model ID. With WordPress AI the model ID can stay blank, and WordPress selects an available model. Contix only needs a text model; Image understanding is used by other ARN products. Click Save model and access settings.
4. Enter the model price
On Model prices, add the input and output price in USD per one million tokens for your model, with Manual pricing or Automatic OpenRouter reference pricing, then save.
Contix records the cost of every request from this price. A request to a model without a price is recorded as Unpriced, and cost caps do not count it. See Queue, costs and logs.
5. Check usage and limits
Usage & limits shows the requests, tokens and estimated cost per product and model. It also holds:
- Shared monthly request limit (0 = unlimited) for all ARN products. Months are UTC calendar months, and every attempted request counts, including tests, failed requests and retries.
- For each product: Allow AI requests, Monthly requests and Monthly tokens.
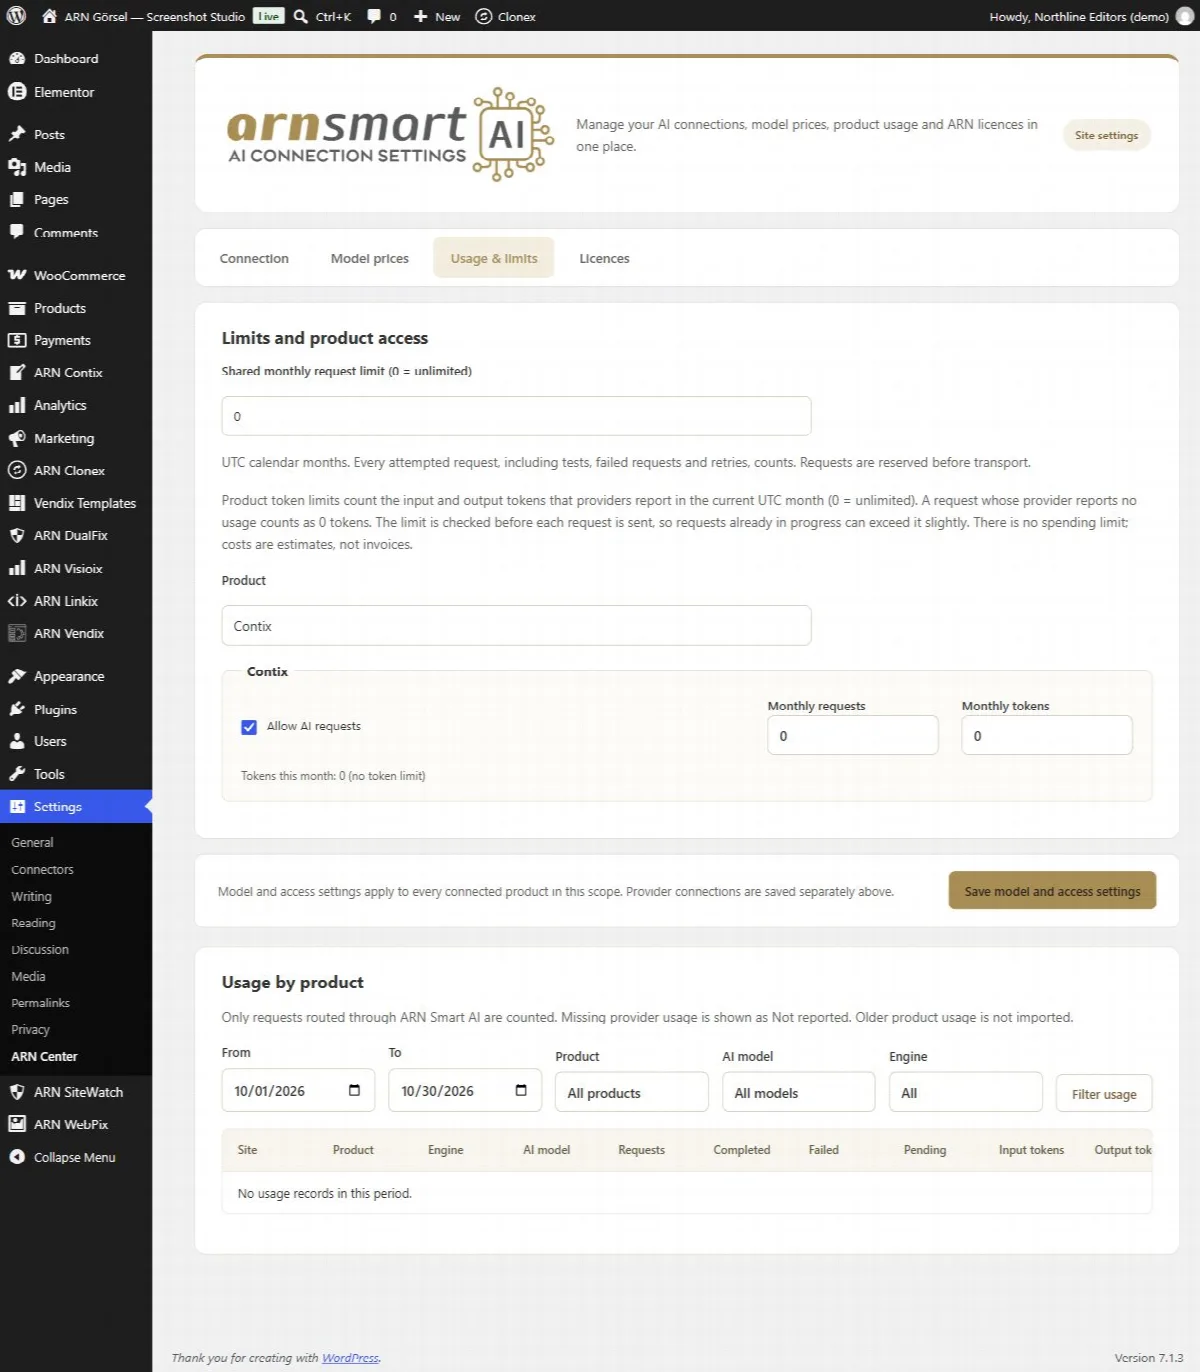
Costs shown here are estimates from your prices. Your provider's invoice is the record of what you pay.
On a multisite network
A network administrator can share one connection with chosen sites through Manage network AI sharing. Those sites use it without seeing or changing the key. Other sites keep their own connections.
Connections from older Contix versions
Provider records that Contix kept itself in older versions are no longer used. ARN Center lists them under Old product connections so you can remove them. Add the connection again in ARN Center.
Check that Contix is ready
Open Production → Production in Contix. Next to Default provider, Contix shows Runtime ready when it can send requests. If it shows Not ready, use the Open AI Settings link on the same screen.
Contix Free: connect AI in ARN Free AI
Contix Free uses Settings → ARN Free AI, the shared AI screen of the ARN Free plugins. Requests go only to the provider you choose there, with your own API key. Nothing is sent to ARN.
- Go to Settings → ARN Free AI.
- Under Connection, choose Direct provider to use your own API key, or WordPress AI to use the provider connected under Settings → Connectors (WordPress 7.0 or later). Off sends no AI requests.
- For a direct provider, choose the Provider for text: OpenAI, Anthropic Claude, Google Gemini, DeepSeek, Kimi (Moonshot AI), xAI Grok, Mistral or OpenAI-compatible / self-hosted.
- In the provider's card, paste the API key. For an OpenAI-compatible service, also enter the Endpoint, the full HTTPS chat-completions address.
- Click Load models and enter a Model ID that supports JSON object output. For Kimi, enter a model available to your account; no model is guessed.
- Click Test connection.
- Under Plugins, make sure AI allowed is ticked for ARN Smart AI Content Workspace.
- Click Save settings.
- Go to AI Content Workspace → AI settings, read the service disclosure, tick the consent "I agree that the topic, audience, source notes and generated sections are sent to the selected AI provider." and click Save settings.
The AI settings tab then shows "AI is set up for text work."
Prices, usage and monthly limits (Free)
- Prices: optional. Enter the price of each model in US dollars per 1 million tokens. Without a price, usage shows tokens only.
- Usage and limits: requests, tokens, cost and failed requests this month, with breakdowns by plugin, feature and model.
- Monthly limit: optional Tokens per month and US dollars per month. When a limit is reached, no new AI request is sent until next month; connection tests still work.
API keys are encrypted with AES-256-GCM. If your server cannot encrypt, set the key in wp-config.php with a constant such as ARN_FREE_AI_OPENAI_KEY instead. If the WordPress salts change, enter the key again.